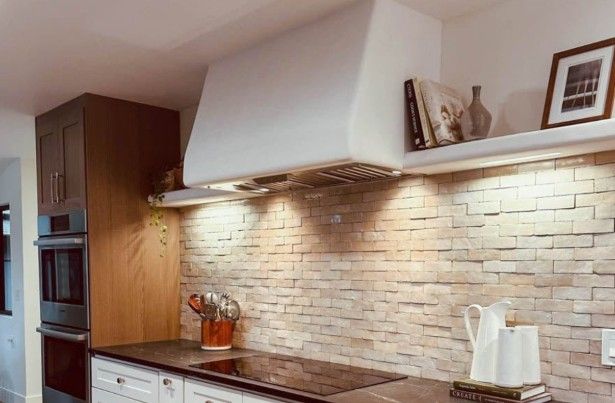
Installing a 36‑inch chimney hood correctly ensures your kitchen ventilation system captures smoke, grease, and odors effectively while maintaining safety and performance. A 36‑inch chimney hood not only enhances kitchen air quality but also contributes to the aesthetic appeal of your space. Understanding proper installation techniques can help you maximize efficiency, comply with manufacturer recommendations, and avoid common pitfalls. Below are expert tips every homeowner should know.
Determine Proper Placement and Height
One of the first steps in installing a 36‑inch chimney hood is choosing the right height above the cooking surface. Manufacturers generally recommend placing the hood 28–36 inches above the cooktop to balance effective capture of combustion by‑products with user comfort. Hoods mounted too low can be exposed to excessive heat or obstruct cooking, while units mounted too high may struggle to draw up smoke and steam efficiently.
Accurate height is especially important with chimney hoods, since they are usually wall‑mounted and vent vertically. Before drilling or attaching brackets, measure and mark the centerline and level height to ensure a precise fit that aligns with your kitchen layout.
Plan Venting and Ductwork Carefully
Proper venting is essential for a 36‑inch chimney hood to function efficiently. Vertical roof runs are ideal for unobstructed airflow, though exterior wall exits are acceptable if needed. Use rigid metal ducting rather than flexible ducts, keep runs short and straight, and limit elbows to two. Seal all joints with HVAC tape to prevent leaks. Proper planning ensures maximum suction, reduces strain on the blower, and improves overall ventilation performance.
Secure Structural Support
A 36‑inch chimney hood must be mounted securely to wall studs or solid backing to support its weight and attached ductwork. Locate studs with a stud finder and add blocking if needed. Use the provided brackets and hardware, and ensure the hood is level before tightening fasteners. Proper support prevents vibrations, rattling, and long-term damage, maintaining safe, reliable operation and preserving the hood’s performance over time.
Connect Electrical Components Safely
Before working on any electrical connections, ensure power to the installation area is shut off. Most chimney hoods require a dedicated 120V circuit, and some models may need hardwiring. Follow local electrical codes, or hire a licensed electrician if you’re not experienced with electrical work.
Once wiring is complete, test the hood’s fan, lighting, and controls before finalizing installation. Confirming functionality early helps catch potential problems before sealing the chimney and wall finishes.
Install the Chimney and Cover Plates
After securing the hood body, install the chimney sections or duct cover according to the manufacturer’s instructions. Many chimney hoods include telescoping chimney extensions that adjust to different ceiling heights, providing a clean and continuous vertical line from the hood top to the ceiling.
Slide the inner chimney sleeve over the support brackets, screw it into place, then slide the outer sleeve into position. Adjust until the assembly aligns evenly with the hood and ceiling. Some models may require temporary tape to hold sections while final adjustments are made.
Maintain for Long‑Lasting Performance
Routine maintenance keeps your chimney hood performing at its best. Clean or replace grease filters according to the manufacturer’s schedule. Many models feature dishwasher‑safe baffle filters that make cleanup easier. Regularly check the ductwork and exterior vents for obstructions, and ensure metal seals remain intact to maintain efficient airflow.
Conclusion
Installing a 36‑inch chimney hood correctly involves thoughtful planning, proper ducting, and secure mounting to ensure effective ventilation and long‑term reliability. By choosing the proper height above the cooktop, using quality ductwork, and securing the unit to solid wall support, you’ll enhance both performance and safety. Careful electrical connections and proper chimney assembly complete the installation process. For those considering various ventilation accessories, a high‑quality range hood vent system can further improve airflow efficiency, reduce cooking odors, and support cleaner indoor air. With attention to these installation tips and manufacturer guidelines, your chimney hood will enhance comfort and functionality in your kitchen for years to come.


Leave a Reply